Garrattfan's Modelrailroading Pages
MDC 3tr Shay
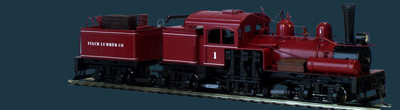
Boiler left side
January 15, 2006
At last, at last something good seems to come out of all this hard work. My hands were almost itching when I picked up my pliers to start on the tubing and all the other details. The MDC manual gives you some clues about how the piping is to be done. You can follow it by the letter. Another option is to find yourself some photographs on the internet or use your imagination. No two Shays were alike so almost any piping you think of is right. You'll have a hard time finding good pictures of the left side of Shays. Everyone always walks over to the right side. Anyway some understanding of the function, controlling mechanisms and process of each apparatus attached to the boiler helps to make a logical piping scheme.
Theoretically you could simply glue the wire to the valves and compressors, but making attachment holes makes life a (w)hole lot easier. Since most pipes are made of 0,45 mm brass wire these holes much be drilled with a 0,5 mm drill. Using a Dremel for such a job is not wise. A Dremel runs at pretty high speeds which is fine for drilling in metal but will make plastic melt. So I did the job by hand. But holding a 0,5 mm drill is not an easy job so I used a small piece of insulation from the electrical wire I used to connect the wipers to the motor as an extra grip
|
 |
||
| First push a small dent in the center
of the place where the hole should come, in this case in a valve |
|||
 |
 |
||
| A 0,5 mm drill somewhat enlarged by a piece of insulation | Drilling often needs only a few turns. | ||


This photo shows that bending and routing the tubes is a three dimensional job.
The MDC manual shows only two dimensional examples of wiring, so you in for some puzzling. Bending the wire takes some skill to estimate the angles and distances. You should bend the wire so that it sits without tension between the attachment holes. You should also see to it that the wire sits almost snug to the boiler. On the other hand don't bother too much about the exact route of the piping. No Shay had one straight pipe!!
I supplied myself with a sufficient load of 0,45 mm brass
wire, eliminating the risk of running out of material. I didn't use the wire
supplied with the kit. First supply of it is very short. Second the wire is
made of steel. Steel is hard to cut and will ruin the flush cutter I have.

This preview of the end result shows you the complete routing of the piping
 |
This is how I work on the frame. Under the superstructure, at the side of the frame there is also some interesting piping. The pipe at hand is the one that runs from the tender to the injector. |

The same pipe and its connection between engine and tender.
The flexible hose is made, once again, of the insulation of electrical wire. Want to see a really detailed photo? Then click here to see the left broadside details and piping. It will give you a good view of the work done and how the pipes run.

Sign my
GuestBook